Mapping Artwork
Lost With Digitizing? You Need a Road Map
If you digitize, or do any kind of advanced editing, you need a road map. What is a road map? A road map is a set of markings on your artwork that indicate how to get from point A to point B. You may have heard it referred to as "mapping your artwork", "artwork preparation", or "planning your digitizing" or "pathing". Mapping your artwork is a very important part of the digitizing process that is often overlooked. Mapping is important for several reasons:
It forces you to think through the whole design from beginning to end
The process of inputting the digitizing points tends to go much faster
It often cuts down the amount of time you spend editing the design
It helps the design sew out more smoothly
You can reduce the number of trims and jumps which reduces the run time (and ultimately will save you money)
So where do you start? The first thing to do is have clean clear artwork, preferably in a black and white line drawing format. (See figure 1-1).
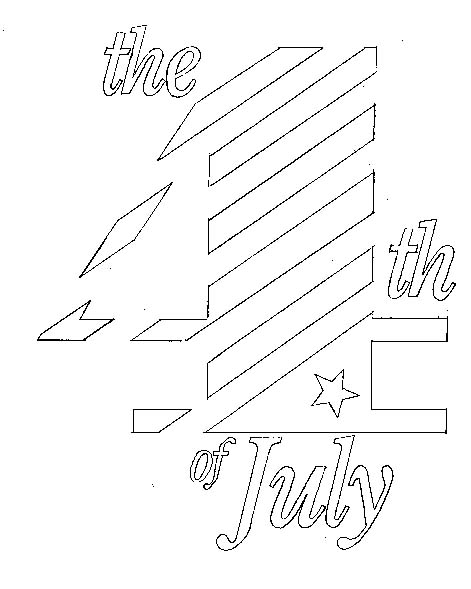
Figure 1-1
This type of artwork seems to be the easiest to map on and work with, whether you are using a tablet or on-screen digitizing. When you mark your artwork for digitizing it is often helpful to use colored pencils. Each color can represent a color change in the design and can help distinguish lines on artwork with many details and color changes. The question often comes up, "how much mapping should I put on my artwork?". The answer is "as many sign posts as you need so you don't get lost". Keep in mind that the more information, planning and marking you do before you begin digitizing, the easier, faster and less frustrating the process will be. Some of the things you need to think about and include in your map are:
Travel all the way through the design in your mind as the machine would. The trick is to keep the needle in the fabric except when there is a color change.
Where will the design start?
What areas will sew first? (what appears to be the furthest away?)
How many color changes will there be? How many colors?
How will the machine travel form one area of the design to another within the same color? (jump, walk, tie off and trim)
What types of stitches will fill or define each area?
What method and type of underlay will be used in each area?(auto or manual and center run, zigzag or edge run)
What input method will be used to define each area?
Determine stitch angles and mark them clearly. (For satin as well as tatami)
Where are the start and end points of each area?
How much pull compensation (column width) will be used?
Will the pull compensation be digitized in or will the computer be adding it?
Note: For new digitizers who are adding compensation as they punch, it is often easier to mark on the artwork the lines indicating where and how much will be added.
Indicate the amount of overlap where two areas meet. (Be generous)
(See figure 1-2 for an example of what your road map may look like.)
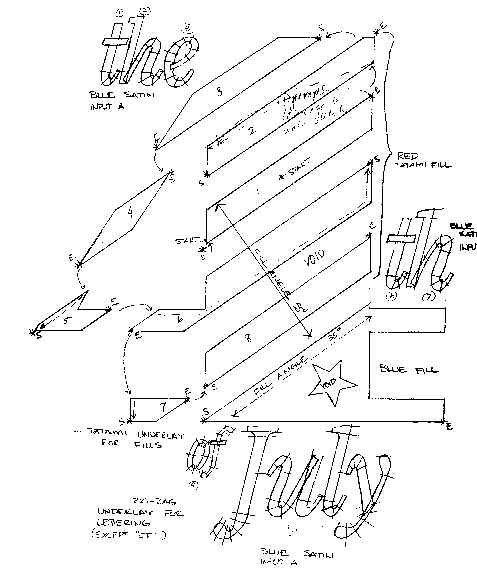
Figure 1-2
Are you a tablet or on-screen digitizer? The answer to this question is helpful because you may decide to map differently depending on the answer. With tablet digitizing, your artwork will most likely be enlarged 6:1 (or at least 3:1), and you can put a lot of mapping information on the artwork and still read it clearly. You also need to think in terms of the scale factor in which you are working. If your artwork is 6:1 then the amount of overlap can appear to be as wide as the Grand Canyon (just remember that it will sew out at 1/6th the size). The compensation you add will often be as much as ¼" on a 6:1 scale. (See figure 1-3).

Figure 1-3
On the other hand, if you are going to be scanning in a drawing at it's final size then the overlap and compensation will not visually be as large. Sometimes if you put numerous marks on your artwork and scan it in, when you zoom in to digitize an area it can get a little messy and hard to follow. If this happens, try having several copies of your artwork at hand. One copy with good clear marks, but not every little tidbit of information. On another copy of the artwork that you don't scan in, put additional "signposts" that will help remind you of your plan. Whether you are using a tablet or computer monitor to digitize it is important to plan your design.
If you are still lost, here are some tips that will get you back on the road to smoother embroidery.
1) Instead of jumping and trimming, remember that you can travel through an area of a design with walking stitches that will be sewn over later.
2) Try using walking stitches with a 1-1.5mm stitch length to hide the traveling stitches under outlined areas. This shorter stitch length will force the traveling stitches to sink into the fabric.
3) Manipulate the design for a smoother sew-out. Instead of using two different colors of green for those leaves, try using the same color of green and changing the stitch angles. This eliminates a color change and you can get the look of two different colors of green. Give it a try, you'll be amazed at the results.
4) You can learn a lot from other digitizers. Take a few designs you know sew smoothly and watch them sew out. Ask yourself, "How did they travel from one area to another?".
5) Above all, be open to trying new techniques. It is easy to keep doing things the same way, out of habit, even if they aren't the most efficient.
It can't be stressed enough how important it is to plan or map your artwork before digitizing. The time it takes to think through and map the design is often far less that the time spent editing and re-editing. Your designs will run smoother and have fewer trims, and best of all you will enjoy the digitizing process more. Even with the new and powerful software that is available today, this important step in the digitizing process should not be overlooked. The auto features in the software are great in speeding up the input process, but they can't completely replace good planning if you want a smooth, quality sew out. So with road map in hand, start digitizing, and have fun because that is why we are in this business isn't it?
By Jeni Jordan
You can learn how to map and much more through our training programs. Check out our training page for information on advanced classes. Check with us for information on individual training sessions.